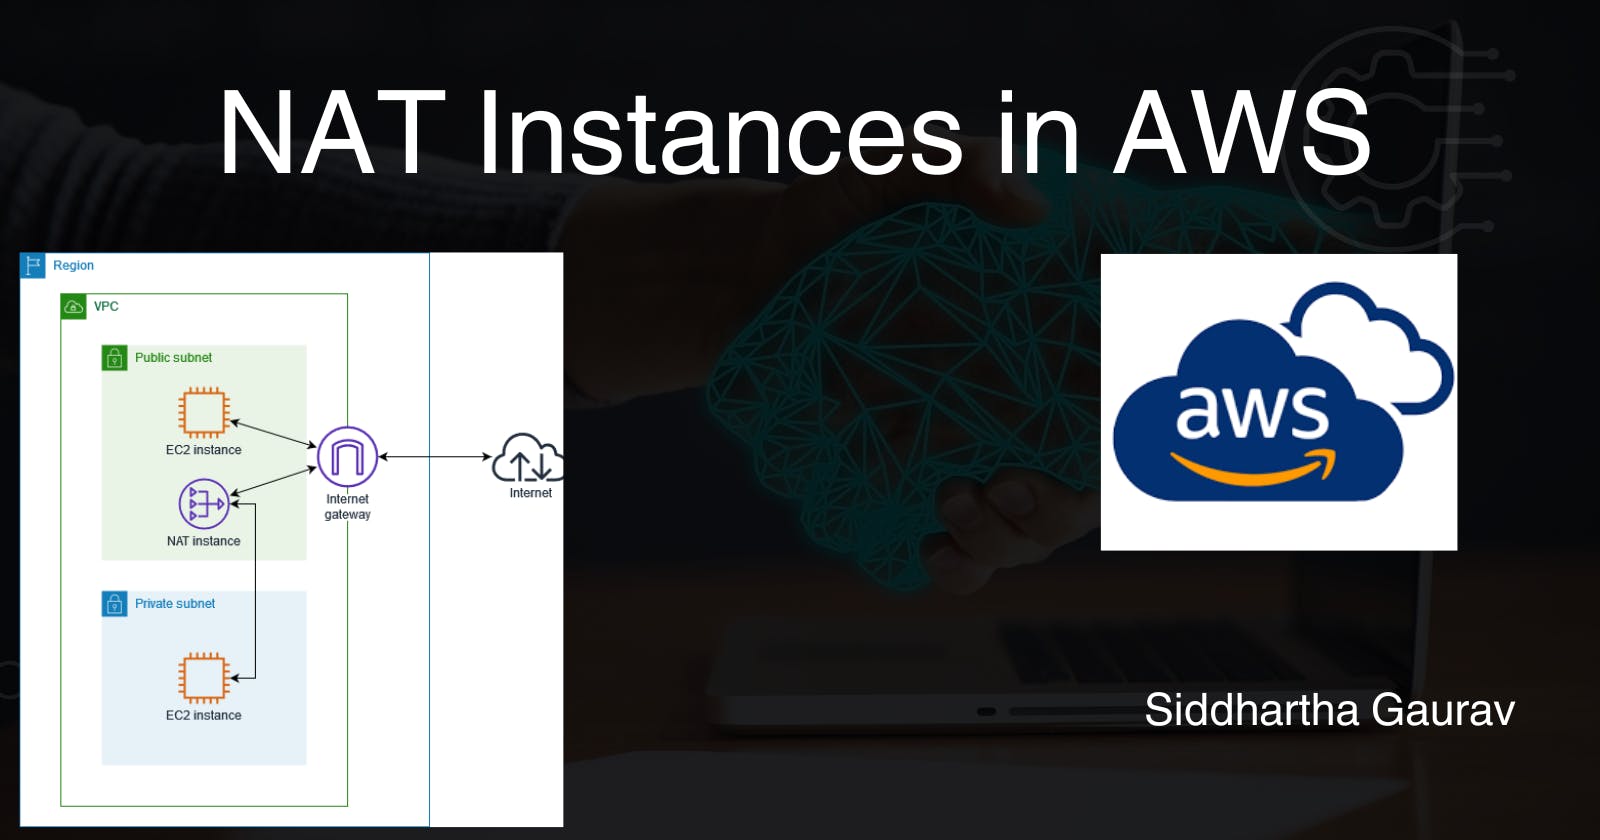
If you're venturing into the world of AWS (Amazon Web Services), you've likely come across the term NAT (Network Address Translation). NAT plays a crucial role in enabling instances in a private subnet to communicate with the internet while keeping them secure. In this guide, we'll demystify NAT instances in AWS and provide practical examples to help you grasp the concept.
What is NAT?
Network Address Translation (NAT) is a method used to map private IP addresses to a public IP address. This process is essential for instances in a private subnet to access the internet while maintaining a level of security. NAT instances act as intermediaries, forwarding traffic from private instances to the internet and vice versa.
Why Use NAT Instances?
In AWS, private instances typically reside in private subnets, isolated from direct internet access. NAT instances serve as a bridge between the private instances and the internet, allowing them to communicate without exposing their private IP addresses.
Setting Up a NAT Instance: Step by Step
Lab Objectives:
In this lab, we will perform the following tasks:
Create a custom VPC.
Establish two subnets - Public and Private.
Set up an Internet Gateway and attach it to the custom VPC.
Create a Route Table and configure a route for internet access. Associate the Public Subnet with this route table to enable internet access for machines within this subnet.
Launch an EC2 instance in the Public Subnet with a Public IP address.
Launch an EC2 instance in the Private Subnet without a Public IP.
Attempt to ping www.google.com from both EC2 instances.
The public EC2 instance should successfully reach www.google.com.
The private subnet instance should not have access to www.google.com, adhering to protocol.
If the above steps are correct, proceed to create a NAT instance in the Public Subnet.
Disable the source/destination check on the NAT instance.
Add a route to the internet in the main route table of the VPC, directing traffic through the NAT instance.
Recheck the reachability of www.google.com from both servers.
- This time, the private EC2 instance should successfully reach www.google.com, facilitated by the NAT instance.
Following these steps will help you understand and implement a secure network architecture within AWS, utilizing public and private subnets with the necessary configurations for internet access and communication.
Step 1: VPC Status
VPC -

Subnet -

Internet Gateway -

Route table -

Routes -

Subnet-Associations -

Step 2: EC2 Status
Public Server - (having public IP)

This machine can reach internet.

Private Server -
This machine have not Public IP address, so we can't connect this machine directly. To connect this private server, we need a Jump server which is an intermediary gateway in a network, enhancing security by providing controlled access to internal servers from external networks.
So we will use our Public server as a Jump server and we will ssh our private server from there.

Let's try to ping google.com from private-server.

It is not able to reach the google.com. If we want to reach the google.com then we need an NAT gateway or NAT instance. We already covered NAT instances in our last blog. This time we will use a NAT instance.
Step 3: Launching a NAT Instance
Let's deploy a NAT instance from the AWS EC2 dashboard.
We only need to select the AMI in section "browse more AMIs" and we need to search for NAT instance.
Also make sure that this instance will also create in our custom VPC and public subnet and must have public IPv4 address.

Step 4: Disabling Source/Destination Check
EC2 Dashboard: Navigate back to the EC2 Dashboard.
Select NAT Instance: Select your NAT instance.
Actions > Networking > Change Source/Dest. Check: Disable the source/destination check.


Step 5: Configuring Route Tables
Navigate to VPC Dashboard: Go to the VPC Dashboard in the AWS Management Console.
Route Tables: Click on "Route Tables" in the left-hand menu.
Edit Route Table: Edit the main route table associated with your custom VPC.
Add Route: Add a route with destination
0.0.0.0/0and target as the NAT instance ID.

Now we have added the route. Its time to again check the connectivity.
Step 6: Testing Internet Connectivity
Let's again ssh to the private server from public server.

Now let's ping google.com from our private server.

Hurray!! with the help of NAT instance, our private subnet servers can reach to internet. By using this, we will make our environment make secure.
Congratulations! You've successfully set up a NAT instance in AWS, allowing instances in your private subnet to access the internet securely.
Conclusion
Understanding NAT instances in AWS is crucial for creating secure and well-connected VPC architectures. This guide aimed to provide beginners with a practical overview of NAT instances, from launching an instance to configuring route tables. As you continue your AWS journey, mastering networking concepts like NAT will undoubtedly enhance your ability to design and manage robust cloud environments. Happy cloud computing!
